If you’re planning to paint your home’s exterior or stain your deck, the prep work you do beforehand will make all the difference in the final result. One of the best tools for surface prep? Pressure washing. 💦
But before you blast away with 3,000 PSI, let’s break down how pressure washing actually helps in prepping surfaces—and how to do it safely and effectively to ensure your paint or stain lasts for years to come. 🏡✅
🧽 Why Surface Preparation Is Crucial
Before paint or stain can properly adhere to a surface, that surface must be:
- Clean (free of dirt, mildew, and grime)
- Dry
- Free of loose paint, stain, or debris
- Smooth but porous enough to hold the new coating
If these conditions aren’t met, your new finish could peel, flake, or discolor in no time. That’s where pressure washing can give you a head start.
💦 How Pressure Washing Helps With Prep
Pressure washing:
- Removes Dirt and Mildew: Grime, pollen, bird droppings, and mold can all interfere with adhesion.
- Strips Loose Paint or Stain: Old, flaking finishes get blasted away, leaving a cleaner canvas.
- Opens Up the Surface Grain (Wood): Makes it easier for stain to soak in evenly.
- Reveals Hidden Damage: Exposes rotted wood, cracks, or paint bubbles that need fixing.
🎨 Whether you’re painting siding, restaining a fence, or sealing a deck, pressure washing ensures better adhesion and longer-lasting results.
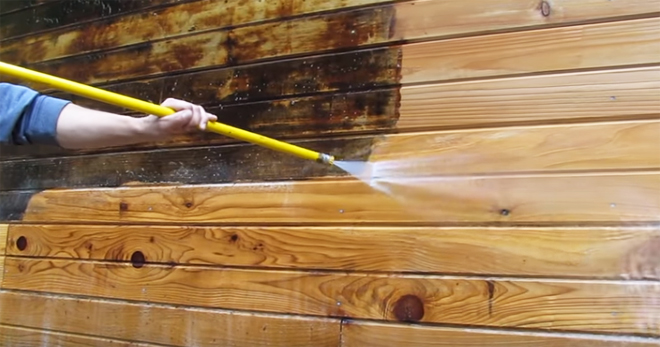
🪵 Using Pressure Washing for Wood Surfaces (Decks, Fences, Furniture)
Wood is soft and can be damaged easily if you’re not careful. Follow these tips:
✅ Use the Right Pressure
- 1,200–1,500 PSI is ideal for soft woods like pine or cedar
- Always use a 25° or 40° nozzle
- Keep the wand 12–18 inches away from the surface
💡 High pressure can cause “furring”—a rough, splintered texture on wood.
✅ Clean with a Wood-Safe Detergent
Use a deck cleaner to remove mildew, mold, and algae. Let it dwell, then rinse.
🧴 Examples: Olympic Deck Cleaner, BEHR All-In-One Wood Cleaner
✅ Let it Dry Thoroughly
After power washing, allow 48–72 hours of dry time before staining. Moisture trapped in the wood can prevent stain absorption and lead to mold underneath.
Browse Amazon Here For Top Rated Power Washers And Accessories
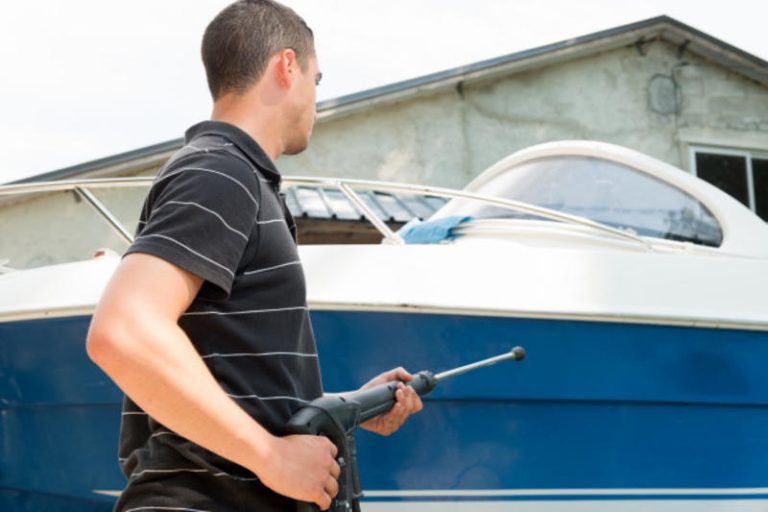
🧱 Using Pressure Washing for Painted Surfaces (Siding, Trim, Brick)
If you’re repainting exterior siding or trim:
✅ Start with a Visual Inspection
Check for flaking paint, mildew, or rotting wood. Fix these issues before painting.
✅ Use a Gentle Approach
- 2,000–2,800 PSI is fine for most siding
- Use a 40° nozzle to avoid damage
- Avoid direct spray on windows, outlets, or light fixtures
🧽 Clean from bottom to top with detergent, then rinse top to bottom with water.
✅ Scrape & Sand After Washing
Power washing removes loose paint, but you’ll still need to scrape any remaining peeling areas and sand edges smooth.
🧼 What About Brick, Concrete, or Stucco?
These surfaces benefit from pressure washing, too—just be cautious:
- Use a wide-angle nozzle (25° or 40°)
- Avoid overly high PSI to prevent chipping or gouging
- Use masonry-safe detergent
- Let dry 2–3 days before applying paint or sealer
🎯 For stucco, soft washing may be a better option to avoid surface erosion.
⚠️ Common Mistakes to Avoid
- ❌ Using too much pressure (can cause surface damage)
- ❌ Painting too soon after washing
- ❌ Skipping detergent or cleaner (water alone isn’t enough)
- ❌ Not checking for lead paint (pre-1978 homes may require special handling)
🧠 Always follow up your wash with proper drying, scraping, and priming if needed.
🧰 Recommended Tools & Supplies
- Pressure washer with adjustable PSI
- Wood or siding-safe detergent
- Stiff-bristle scrub brush
- Putty knife or paint scraper
- Sandpaper or orbital sander
- Drop cloths and painter’s tape for masking
🧴 Don’t forget eye protection and gloves for safety!
📅 Timing Tips
- Wash at least 2–3 days before painting
- Avoid washing in extreme heat or direct sunlight
- Try to paint within a week of washing to prevent re-contamination
🌤️ Aim for dry, mild weather to allow surfaces to dry thoroughly.
✅ Final Thoughts
Pressure washing is an essential first step in any painting or staining project. It not only improves the appearance of your home or deck but sets the stage for longer-lasting, more beautiful finishes.
Clean it. Let it dry. Then seal, stain, or paint with confidence. 🎨💪🧽
Browse Amazon Here For Top Rated Power Washers And Accessories