Vinyl shutters are one of those exterior details that make a big visual impact but often go overlooked when it’s time to clean the house. Over time, they gather layers of grime, dust, cobwebs, mildew, and pollen — especially if your home is near trees or has minimal sun exposure on certain sides. 😷
So when it comes time to pressure wash your house, a common question arises:
Can I just pressure wash my vinyl shutters while they’re still mounted? Or should I remove them first?
The answer: Yes, you can pressure wash them while they’re attached — but with proper technique and precautions. Removing them isn’t necessary in most cases unless they’re very fragile, very dirty behind, or improperly secured.
Let’s explore when to leave them in place, when to take them off, and how to safely clean them without causing any damage. 🧼🏠
🧽 Why Clean Vinyl Shutters at All?
You might think shutters are too high up or too small to worry about — but once you clean them, you’ll realize how much grime was dulling the look of your entire exterior. Clean shutters:
✅ Improve curb appeal
✅ Help prevent mildew and staining
✅ Extend the life of the plastic
✅ Keep insects and cobwebs from nesting in crevices
For real estate agents and house flippers, fresh-looking shutters are a big plus. 💰✨
🔧 Should You Remove Vinyl Shutters to Pressure Wash?
Removing shutters can be done, but in most cases, it’s not required — and often causes more hassle than benefit.
Here’s a quick breakdown of when you should consider removing them:
✅ Reasons to Remove:
- You’re repainting or refinishing them
- Water and mold have built up behind them
- They are loose, brittle, or cracked
- You’re doing a full exterior siding replacement
- You want to deep clean the entire surface under the shutter
❌ Reasons to Leave Them On:
- They’re securely attached
- You’re just doing a routine surface clean
- The areas behind them aren’t moldy or dirty
- They’re too high up to safely remove without scaffolding
In short, if your shutters are in good shape and you’re not dealing with mold behind them, leave them on and wash them properly with your pressure washer. 💦🪟
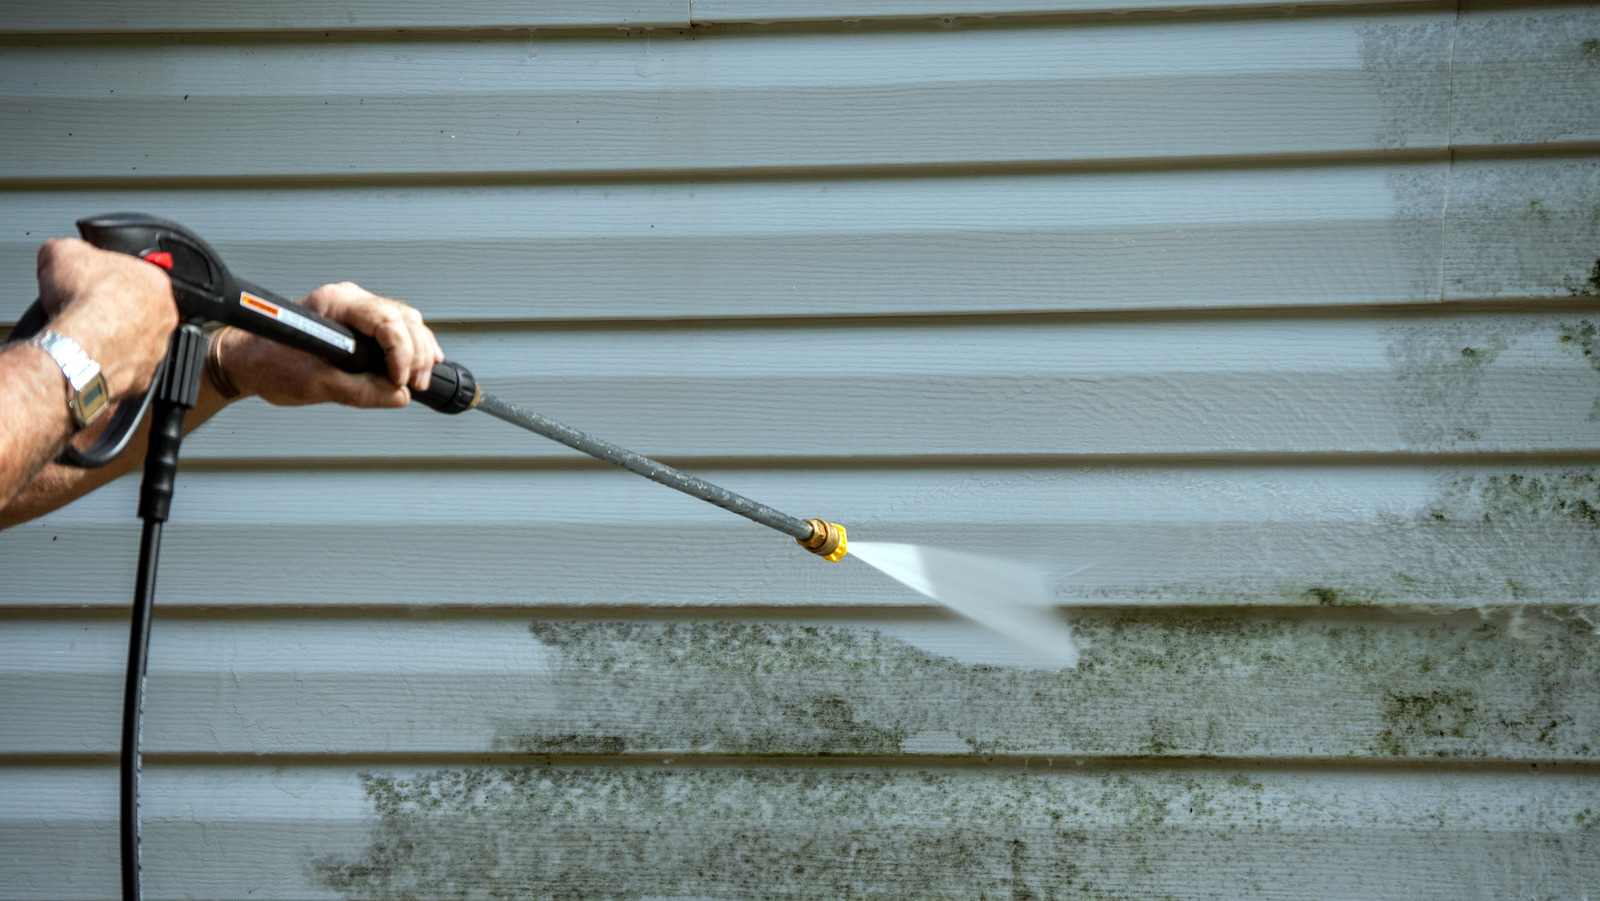
🛠️ How to Pressure Wash Vinyl Shutters Safely (While Still Mounted)
Vinyl can crack, warp, or even snap if hit too hard or too close. Here’s a safe and effective method to get them sparkling clean without damage:
✅ Step 1: Use a Gentle Cleaning Solution
Mix up a vinyl-safe house wash detergent. Some store-bought options are:
- Simple Green House + Siding Cleaner
- Krud Kutter Exterior Cleaner
- Mold Armor for Vinyl Surfaces
You can also DIY your own mix:
- 1 gallon water
- 1/3 cup laundry detergent
- 2/3 cup oxygen bleach or vinegar
Spray the solution onto the shutters using a pump sprayer or the detergent tank on your pressure washer.
✅ Step 2: Let the Solution Dwell
Allow the cleaner to sit for 5–10 minutes. This gives it time to loosen dirt, mildew, and spider webs. Don’t let it dry completely, or you may end up with streaks.
✅ Step 3: Choose the Right Nozzle and Pressure
- Use a 25° or 40° spray tip
- Keep pressure under 2,000 PSI
- Stand at least 12–18 inches away
- Spray at a 45° angle downward, not directly upward
Aiming upward risks forcing water behind the shutters or under the siding, which can lead to trapped moisture and mold. 💧🚫
Browse Amazon Here For Top Rated Power Washers And Accessories
✅ Step 4: Rinse Gently and Evenly
Move side to side in even strokes, rinsing each shutter from top to bottom. Don’t linger too long in one spot — you could cause denting or streaks.
✅ Step 5: Inspect and Repeat If Needed
Heavily soiled shutters may need a second round. Use a soft bristle brush on stubborn areas before the second rinse.
⚠️ What to Avoid
To avoid damaging your shutters or siding, keep these pressure washing “don’ts” in mind:
🚫 Don’t use a zero-degree nozzle — it can gouge vinyl
🚫 Don’t use bleach unless diluted properly — it can discolor plastic
🚫 Don’t spray behind the shutters or into the gaps
🚫 Don’t pressure wash in freezing temps — cold vinyl is brittle
🚫 Don’t pressure wash loose or cracked shutters — fix first
🧰 What If I Decide to Remove the Shutters?
If you absolutely want to remove them for a deeper clean, here’s what to know:
- Most vinyl shutters are fastened with shutter spikes or screws
- If they’re glued or nailed in, removal can be tricky or destructive
- Removing them can expose the wall behind to cleaning, repainting, or mildew inspection
- Be sure to mark the placement if you want to reinstall them properly
- Store them flat and out of the sun while off the house
Unless you’re planning to repaint or replace them, most homeowners prefer the easier method of leaving them in place and washing carefully.
💡 Pro Tips for Long-Term Clean Shutters
- Clean annually — ideally in spring or early summer 🌞
- Seal them with a UV protectant like 303 Aerospace Protectant to prevent fading
- Trim back plants and trees near shutters to reduce pollen and sap buildup 🌿
- Check for wasp nests and spider webs in crevices before washing 🐝🕷️
🧠 Common Questions
Q: Will pressure washing fade the color of my vinyl shutters?
A: Not if you use low pressure and avoid harsh chemicals. Fading usually comes from sun damage, not pressure washing.
Q: Can I use hot water in my pressure washer for better results?
A: Yes, warm water can help loosen grime — but don’t go over 140°F on vinyl.
Q: Is it better to clean shutters by hand?
A: You can, but it’s time-consuming and difficult for shutters on second stories. Pressure washing is safe if done right.
✅ Final Verdict: Leave Them On, Clean Them Smart
You don’t need to remove vinyl shutters to get them clean — pressure washing while they’re mounted is safe and effective when done with care. Use the right detergent, proper angle, and gentle PSI, and your shutters will go from dull and dusty to fresh and fabulous in minutes. 💦🪟✨
Unless you’re dealing with mold buildup behind them or planning a full repaint, save yourself the hassle and clean them in place.
Browse Amazon Here For Top Rated Power Washers And Accessories