Brick exteriors bring a timeless charm and rustic beauty to homes, patios, and walkways. But over time, even the most durable masonry surfaces collect grime, mold, algae, soot, and stains that dull their appearance. That’s where power washing comes in — but proceed with caution! ⚠️💦
Brick may be tough, but it’s also porous and prone to damage if you use too much pressure or the wrong technique. In this guide, we’ll cover the best practices for safely and effectively power washing brick and mortar surfaces so you can restore their natural beauty without causing long-term damage.
Let’s scrub in! 🧼🧽
🧠 Understanding Brick and Mortar
Before you fire up the power washer, it’s important to understand what you’re working with:
- Brick is porous and absorbs moisture, especially older or handmade bricks.
- Mortar joints (the material between bricks) are softer and can deteriorate under high pressure.
- Over time, exposure to the elements can weaken both — especially when power washing is done incorrectly.
So while power washing can clean brick effectively, it must be done with the right equipment and methods.
✅ When to Power Wash Brick
Power washing is great for removing:
- Mold and mildew 🌿
- Moss and algae
- Dirt and pollution stains
- Paint flakes (for repainting or restoration)
- Efflorescence (white mineral streaks)
But avoid power washing if your brick:
- Is crumbling or flaking (known as spalling)
- Has large cracks in the mortar
- Is more than 100 years old — historical bricks can be fragile
💡 If your brick is damaged or historic, consult a masonry restoration expert before cleaning.
🧼 Best Practices for Power Washing Brick
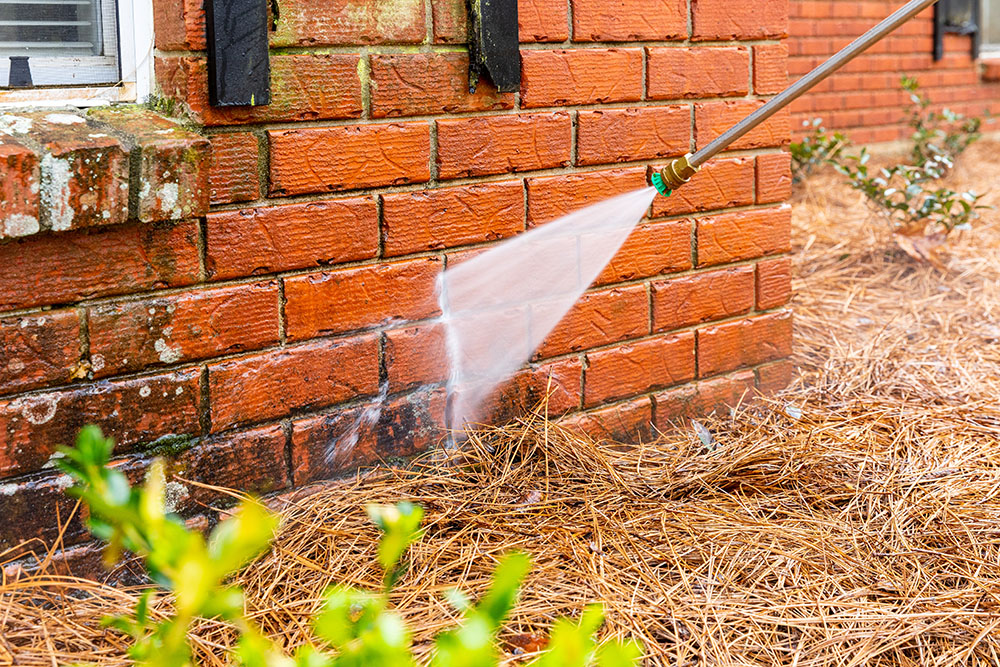
✅ 1. Use a Low-Pressure Setting
The #1 rule: Don’t blast it.
Use a pressure washer with:
- 500–1,200 PSI max
- A 25- or 40-degree nozzle (green or white tip)
- At least 12 inches of space between the nozzle and surface
High pressure can:
- Erode mortar
- Chip brick edges
- Force water deep into pores, leading to mildew later
🚿 Always start with the lowest pressure and work your way up only if necessary.
Browse Amazon Here For Soft Washing Equipment And Accessories
✅ 2. Pre-Wet the Surface
Before applying detergent or pressure:
- Soak the brick with water to prevent absorption of chemicals
- This also helps loosen surface debris for easier cleaning
Use a garden hose or a light rinse from the washer with no detergent.
💧 Never apply detergent to dry brick — it increases the chance of discoloration.
✅ 3. Use Brick-Safe Cleaning Solutions
Choose a cleaner specifically designed for masonry or brick. Avoid:
- Bleach-heavy mixes
- Harsh acids like muriatic acid (unless properly diluted and used by pros)
Popular cleaning solutions:
- Oxygenated cleaners (environmentally friendly 🌿)
- Algae and mildew removers
- Degreasers for patios or garage walls
Apply with a pump sprayer and let sit for 5–10 minutes (but don’t let it dry).
✅ 4. Work in Sections from Bottom to Top
To avoid streaking:
- Clean from bottom to top (yes, it feels backwards!)
- Rinse top to bottom
Why? Water from above can run down and leave streaks on areas you haven’t cleaned yet.
🧽 Scrub extra-dirty spots with a soft brush or broom after soaking.
✅ 5. Rinse Thoroughly — But Gently
Once the cleaner has loosened the grime:
- Use a low-pressure rinse (25–40° tip)
- Keep a steady 12–18″ distance
- Avoid directing water into mortar joints at sharp angles
💡 Rinse in overlapping motions to ensure even cleaning.
❄️ Seasonal Considerations
Brick absorbs moisture, so:
- Don’t power wash in freezing temperatures
- Avoid rainy days when brick is already saturated
- Let the surface dry for 48–72 hours post-wash if you plan to seal it
🧰 Tools and Gear Checklist
- ✅ Pressure washer (500–1,200 PSI)
- ✅ 25° or 40° spray tip
- ✅ Pump sprayer (for detergent)
- ✅ Brick-safe cleaning solution
- ✅ Soft bristle brush
- ✅ Safety goggles and gloves 🧤🕶️
- ✅ Waterproof boots and clothing (you will get wet!)
🧱 Optional: Masonry sealer to apply after cleaning for long-term protection.
Browse Amazon Here For Top Rated Power Washers And Accessories
❓ Should You Seal Brick After Washing?
Sealing is not required, but can help:
- Prevent water intrusion and efflorescence
- Reduce mold and mildew buildup
- Maintain a cleaner appearance for longer
Only seal after the brick has completely dried for at least 48–72 hours.
Choose a breathable masonry sealer that allows moisture to escape — avoid high-gloss products that trap water.
🧑🔧 DIY vs. Professional Help
DIY is fine if:
- Your brick is in good condition
- You’re using appropriate pressure
- You’ve done your research 🧠
Call a pro if:
- Your brick is fragile, historic, or spalling
- Mortar is cracked or loose
- You’re unsure about equipment settings or cleaners
Hiring a professional power washing company ensures safe results — and most come with insurance, so you’re covered. 👍
✅ Final Thoughts
Brick surfaces are beautiful, durable, and long-lasting — but only if treated with care. Power washing brick the wrong way can lead to costly repairs, but with the right technique, you can restore your masonry to like-new condition.
🧱 Key reminders:
- Use low pressure
- Pre-wet and pre-treat with masonry-safe detergent
- Clean bottom to top, rinse top to bottom
- Avoid sharp angles and blasting mortar joints
Treat your brick gently and it’ll stay strong and stunning for decades. 💪🧼
Browse Amazon Here For Top Rated Power Washers And Accessories


