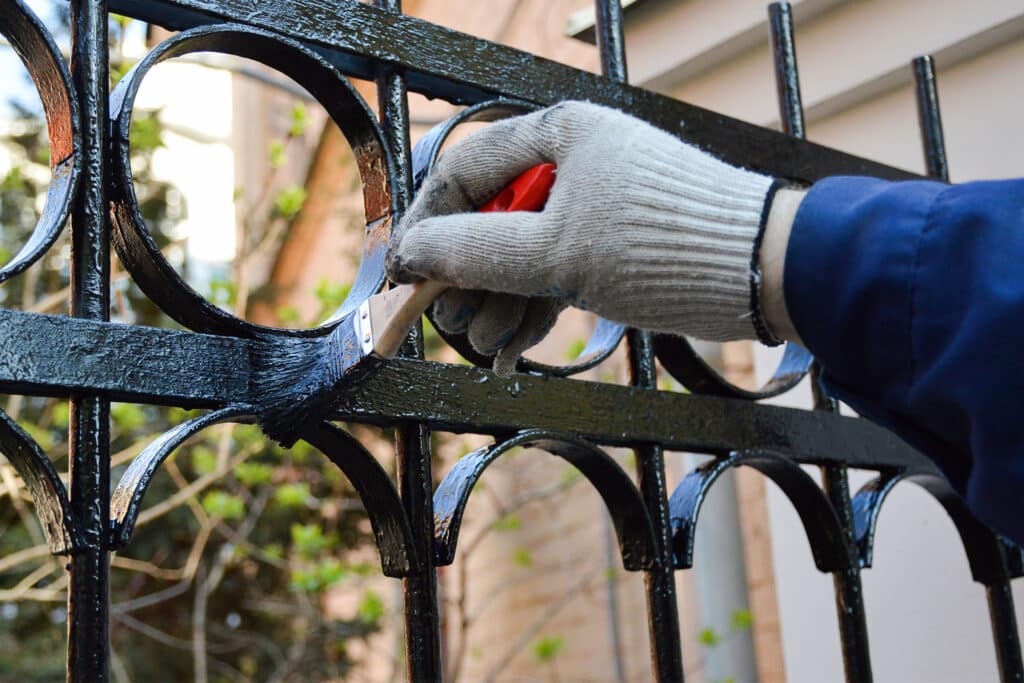
Repainting metal railings or fences might seem straightforward — grab a brush and go, right? Not quite. One of the most important and often overlooked steps is surface preparation, and that’s where pressure washing comes into play. So the question is: Should you pressure wash before repainting metal fences or railings? Let’s break it down.
🧼 Why Surface Prep Is Crucial for Metal
Metal surfaces — whether wrought iron, steel, or aluminum — can develop:
- Rust
- Flaking paint
- Mildew or mold
- Dirt and grime buildup
All of these interfere with new paint’s ability to adhere properly. If you skip cleaning or prepping the surface, the paint will chip, bubble, or peel prematurely, even if you’re using high-quality products. 🎨
✅ Yes, Pressure Washing Is Highly Recommended
Pressure washing is one of the best ways to prep metal fencing or railings before painting. It helps by:
✔️ Removing loose paint flakes
✔️ Blasting away dirt, spiderwebs, and mildew
✔️ Cleaning rust-prone spots for further treatment
✔️ Providing a clean, dry surface for primer and paint
⚠️ But It Has to Be Done Right
Pressure washing metal is not without its risks. If done improperly, it can:
- Bend or dent thin metal bars
- Push water into joints or welds, leading to rust from within
- Chip paint unevenly, leaving the surface rough
That’s why technique matters. 👇
🛠️ Best Practices for Pressure Washing Metal Before Painting
🔹 Use Medium Pressure (1500–2000 PSI)
Metal doesn’t need extreme pressure. Stay in the moderate range to avoid damage while still removing grime and loose paint effectively.
🔹 Use a 25° or 40° Spray Tip
Avoid 0° or 15° nozzles — they’re too harsh and can damage the surface. A wide-angle tip provides even cleaning.
🔹 Keep a Distance of 12–18 Inches
Getting too close may gouge or dent the metal. Keep a safe distance and move the wand in slow, sweeping motions.
🔹 Let the Surface Dry Thoroughly
After washing, let the metal dry completely — at least 24–48 hours depending on humidity. Painting on damp metal will trap moisture and lead to rust.
Browse Amazon Here For Pressure Washers And Accessories
🧽 What to Do After Pressure Washing
Pressure washing isn’t the last step before painting. Here’s what to do next:
- Inspect for rust
Use a wire brush or grinder to remove any remaining rust. - Sand rough spots
Smooth out any peeling paint edges or metal imperfections. - Apply metal primer
A rust-inhibiting primer is essential to lock down the surface and prevent future corrosion. - Paint with the right product
Use outdoor-rated, metal-specific paint, preferably oil-based or a high-quality enamel.
🧱 Bonus Tip: What About Galvanized Steel?
If you’re repainting galvanized metal, be cautious. Galvanized coatings are more delicate and can be damaged by high pressure. Use lower pressure (under 1500 PSI) and avoid harsh chemicals that could react with the zinc coating.
🧰 When NOT to Use Pressure Washing
There are some situations where pressure washing might not be ideal:
🚫 If the metal is already corroded and brittle
🚫 If the railing is loosely mounted or unstable
🚫 If nearby landscaping or electrical fixtures could be damaged by overspray
In these cases, hand-scrubbing or using a soft wash method may be safer.
🤝 DIY vs. Hiring a Pro
If your metal fencing is extensive or complex, hiring a professional can be a smart move. Pros will know:
- The right pressure to use
- What nozzles and detergents are safe
- How to manage runoff and avoid damaging nearby areas
For small residential projects, though, a careful DIYer with a rented pressure washer and the right safety gear can get the job done.
🚧 Final Verdict: Pressure Washing Is a Must — If Done Right
Yes, pressure washing is a critical first step before repainting metal railings or fences. It ensures that paint adheres properly and lasts longer, saving you time and money in the long run.
Just be sure to follow the correct procedures to protect your metal and maximize your paint job’s lifespan. A little extra effort in prep means a stronger, cleaner, more beautiful finish. 🏡✨🎨
Browse Amazon Here For Pressure Washers And Accessories