Power washing can work wonders—but in the wrong hands, it can also be surprisingly destructive. Whether you’re a homeowner tackling a DIY job or a new power washing professional, surface damage is a real risk. One wrong move and you could strip paint, gouge wood, or crack siding. 😬
So what do you do when the unthinkable happens and you’ve damaged a surface during power washing?
Don’t panic. 🧘 In this article, we’ll walk you through exactly how to assess the damage, repair it, and avoid repeating the mistake. Let’s turn this slip-up into a learning experience! 💪
⚠️ Common Types of Power Washing Damage
Power washers produce a high-pressure stream of water—anywhere from 1,300 to 4,000+ PSI—which can be more than enough to destroy surfaces if not used properly. Some of the most common issues include:
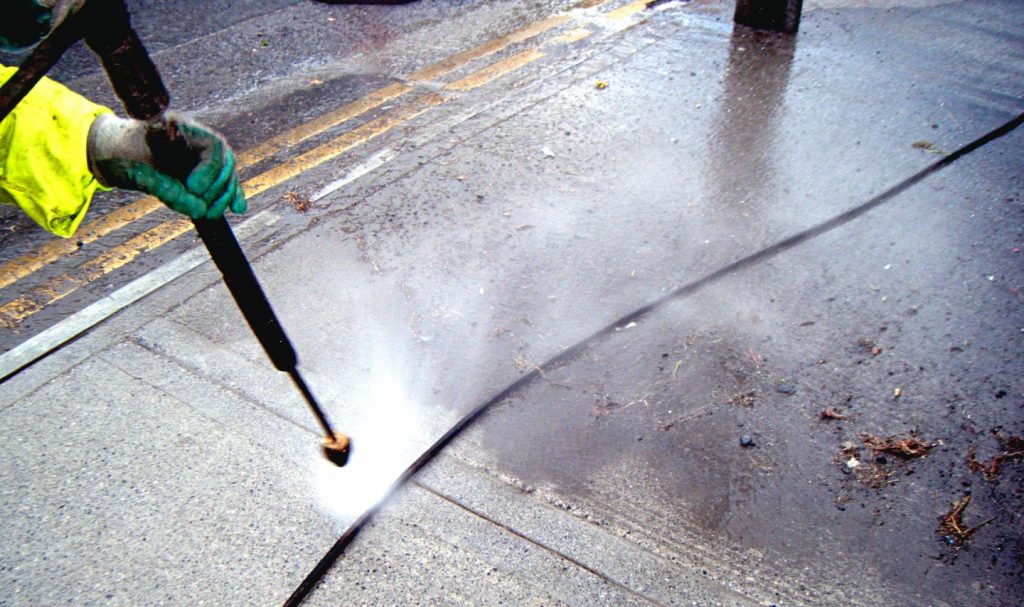
- Etched concrete 🏗️
- Splintered or gouged wood 🪵
- Chipped or stripped paint 🎨
- Cracked vinyl siding 🧱
- Blown-out window seals or screen damage 🪟
- Stripped mortar or weakened brick joints 🧱❌
Knowing what went wrong is the first step in fixing it.
🧐 Step 1: Identify the Severity of the Damage
Once you notice the damage, stop power washing immediately and inspect the area:
- Is it cosmetic or structural?
Cosmetic damage like light paint chipping or minor wood splinters is fixable. Structural damage like cracked siding or deep gouges may require replacement. - How big is the affected area?
A small damaged patch may be repaired easily, but larger areas might need professional help. - What material is damaged?
Different surfaces require different fixes—wood, concrete, brick, vinyl, and paint all respond differently.
📸 Tip: Take pictures of the damage for reference or to show a contractor if needed.
🧰 Step 2: Immediate Damage Control
Here are some ways to address common surface damage right away:
🔧 For Gouged or Splintered Wood:
- Lightly sand the surface to smooth out splinters or raised grain.
- For deeper gouges, use wood filler, then sand and seal or repaint as needed.
- Allow wood to dry completely before attempting repairs.
🪵 Common areas: decks, fences, patio furniture
🔧 For Stripped Paint:
- Scrape off any loose or flaking paint.
- Prime and repaint the affected section using exterior-grade paint.
- Make sure the surface is dry and clean before painting.
🎨 Tip: Always repaint in dry weather for proper curing.
🔧 For Etched Concrete:
- Superficial etching may fade over time.
- For deeper marks, use a concrete patch kit or have it resurfaced professionally.
- Seal the concrete afterward to help blend the repair.
🧱 Avoid future damage by using a wide fan tip and keeping the nozzle 12+ inches away.
🔧 For Damaged Vinyl Siding:
- Small cracks can be patched with caulk or vinyl repair kits.
- Larger cracks or holes may require replacing individual siding panels.
- Use a siding removal tool to carefully slide out and replace damaged sections.
💡 Vinyl is especially sensitive to high pressure—use lower PSI and a wider spray angle next time.
Browse Amazon Here For Top Rated Power Washers And Accessories
👨🔧 Step 3: Decide Whether to DIY or Call a Pro
Some repairs are best left to professionals—especially if:
- The damaged area is large or structural
- The surface is historic, delicate, or expensive
- You’re unsure how to properly repair it
Calling a siding specialist, painter, or concrete repair contractor may be the safest choice if you’re out of your depth.
📞 And if you’re a pro who damaged a client’s property, communicate transparently and offer to cover repair costs. Honesty goes a long way. 🙏
✅ Step 4: Learn from the Mistake
Here’s how to avoid making the same mistake again:
✅ Use the Right Nozzle
- A 40-degree white tip is safest for delicate surfaces.
- Avoid zero-degree (red) tips unless you’re removing tough grime from concrete or metal.
💧 The narrower the spray angle, the more pressure is concentrated in one area.
✅ Adjust the Pressure
- Use 1,300–1,600 PSI for wood or vinyl siding
- Use 2,500–3,000 PSI for concrete
- Start low and test on an inconspicuous area
📏 Always maintain a safe distance from the surface—at least 12 inches for soft materials.
✅ Know Your Surface
Understand what you’re working with. Older or painted surfaces, rotted wood, brittle mortar, and aging vinyl are all more susceptible to damage.
🎯 Tip: When in doubt, soft washing (low pressure with detergents) is a safer alternative.
🔄 Bonus: How to Handle Damage If You’re Running a Power Washing Business
If you’re a contractor, damaging a client’s property is serious—but it doesn’t have to ruin your reputation. Here’s how to handle it professionally:
- Own the mistake. Don’t make excuses. Be transparent with the client.
- Document everything. Take photos, notes, and track communication.
- Offer a solution. Repair it yourself (if qualified), hire a pro, or reduce the invoice.
- Have insurance. General liability insurance can cover repair costs in worst-case scenarios.
- Use waivers and disclaimers. These documents can protect your business and educate clients on surface risks.
🧾 Building trust during a tough moment can turn an accident into a loyal customer.
🌟 Final Thoughts
Mistakes happen—even when you’re careful. Whether you’ve etched your driveway or chipped the paint on your siding, it’s not the end of the world.
With a calm approach and the right steps, you can fix the damage, prevent it from happening again, and keep your property (or reputation) in great shape. 🏡✨
Remember: power washing is a powerful tool—but with great pressure comes great responsibility! 💦⚡
Browse Amazon Here For Top Rated Power Washers And Accessories


