Wooden fences are a timeless feature in any yard — they add character, define space, and offer privacy. But like any outdoor surface, they take a beating from the elements. Dirt, mold, algae, and sun exposure can make even a fairly new fence look worn and tired.
That’s where power washing comes in — but before you crank up your machine and start blasting away, you should know this: you can absolutely damage your fence if you’re not careful. 😬
In this guide, we’ll walk through how to power wash a wooden fence safely, efficiently, and without splintering or stripping the wood. Your fence will look refreshed, and you’ll preserve its integrity for years to come. 🌿🪵
🌧️ Why Wooden Fences Get Dirty
Your fence is exposed to:
- Rain and humidity → which breeds mildew and algae
- Sunlight → which fades and dries out the wood
- Dirt and dust → kicked up by wind, traffic, or lawn care
- Plant growth → vines and moss can trap moisture
Left untreated, this buildup:
- Causes discoloration
- Traps moisture in the wood
- Leads to rot and decay
- Makes paint or stain peel prematurely
💡 A clean fence isn’t just about looks — it’s about long-term protection.
⚠️ Why You Need to Be Cautious When Power Washing Wood
Wood, especially softwoods like cedar or pine, can be easily damaged by high pressure. If you’re not using the right settings or technique, you might:
- Splinter the surface
- Raise the wood grain
- Create gouges or lines
- Force water deep into the wood fibers
And once that happens, no amount of staining or sealing can fully hide it.
So what’s the safe way? Read on. 👇
🧰 What You’ll Need
Equipment:
- Pressure washer (1,500–2,000 PSI is ideal)
- 25° or 40° nozzle tip (NEVER 0° or 15°)
- Deck or fence cleaner (biodegradable preferred)
- Scrub brush (for tough spots)
- Garden hose
- Protective gear (gloves, goggles, boots)
🧠 Optional: drop cloths or tarps to protect nearby plants
Browse Amazon Here For Pressure Washing Equipment And Accessories
🧼 Step-by-Step: How to Power Wash a Fence the Right Way
Let’s go through the safe method for fence cleaning.
Step 1: Inspect the Fence 🔍
Walk the entire fence line. Look for:
- Loose boards or screws
- Rotting sections
- Missing nails or warped planks
Fix these before washing — water can make damaged areas worse.
Step 2: Pre-Wet the Fence 💧
Use your hose to soak the wood before applying detergent. This helps keep the wood from absorbing too much cleaner and allows for more even coverage.
Step 3: Apply Cleaning Solution 🧴
Use a wood-safe cleaner made for fences or decks. Apply with a sprayer or directly through your pressure washer’s soap nozzle.
Let it dwell for 5–10 minutes — but don’t let it dry.
Browse Amazon Here For Wood Safe Cleaners
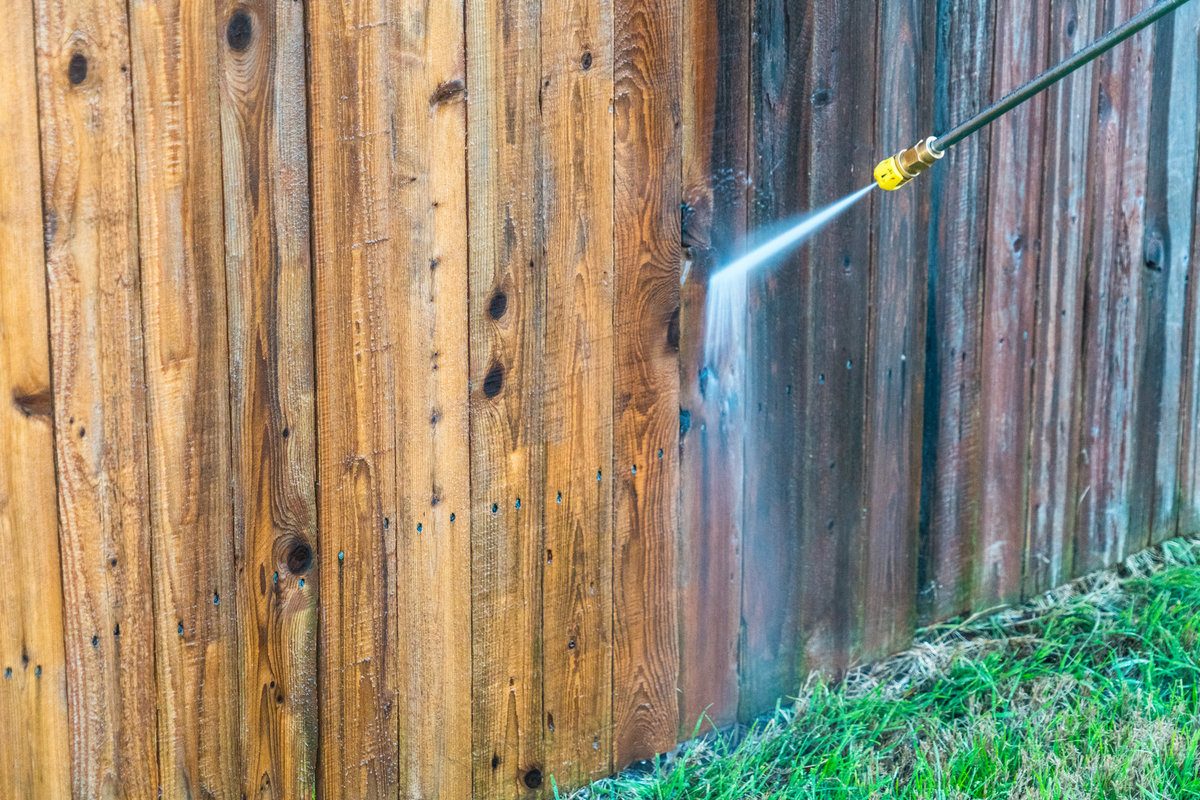
Step 4: Start Power Washing 🪄
Now for the main event:
- Use a 25° or 40° nozzle
- Hold the wand 12–18 inches from the surface
- Spray in long, even passes with the grain of the wood
- Keep your strokes moving — don’t stay in one spot too long
- Start from the top and work your way down
🚫 Avoid spraying into gaps or cracks — it can trap water behind the boards.
Step 5: Rinse Thoroughly 💦
After washing, use your hose or a wide-spray setting to rinse the fence. This removes any lingering detergent and ensures a clean finish.
Step 6: Let It Dry ☀️
Give the fence 24–48 hours to dry completely before sealing, staining, or painting.
You’ll likely see the color brighten as it dries — that’s the wood breathing again. ✨
🧠 Pro Tips for Even Better Results
- Clean your fence in the spring or early fall — not in the peak heat
- Add a mold inhibitor to your detergent if your area is very humid
- If your fence is older, test a small section first
- Wear eye protection — wood fibers and water can fly back
- Don’t forget to wash the posts and top rails — they matter too
🧽 A clean fence can actually make your whole yard feel newer.
🛠️ Should You Sand After Washing?
If the wood feels rough or fuzzy after drying, light sanding can restore a smooth finish before sealing. Use:
- 60–80 grit sandpaper for light smoothing
- A sanding sponge for hand-detailing small areas
Don’t skip this step if you’re planning to stain — rough wood absorbs unevenly.
🧱 What About Vinyl or Composite Fencing?
This guide is focused on wood, but for reference:
- Vinyl fences can be washed with higher pressure — they’re tougher
- Composite fencing should be cleaned more gently, like soft washing
If you’re unsure, always check the manufacturer’s care instructions.
✅ Final Thoughts
Power washing your wooden fence is a satisfying, affordable way to revive its look and extend its lifespan. But it’s not about brute force — it’s about smart technique.
Keep these basics in mind:
- Use low to medium pressure
- Wash with the grain
- Prep, rinse, and dry completely
- Consider sealing afterward for protection
Do it right, and your fence will not only look amazing — it’ll stand strong for years to come. 🪵🧼
Browse Amazon Here For Pressure Washing Equipment And Accessories


